Introduction: This section details a project I just completed on
the Butterfly. I moved the black water rinse input fitting from
the fresh water compartment to the waste water compartment. A
crude diagram details where these compartments are located
You can click on any of the thumbnails to see the full size LARGE photo
for details.
.
I hope this diagram helps a little. A narrative
of the process with photos follows.
First some background as to why I have taken on this
project. Tiffin Motorhome installed all of the water input flanges in
the same compartment. The input for City water, along with the
fresh and hot water tank drain valves, the outside shower hose and
the city/tank fill valve are all in this place. The fresh water tank fill is on the outside
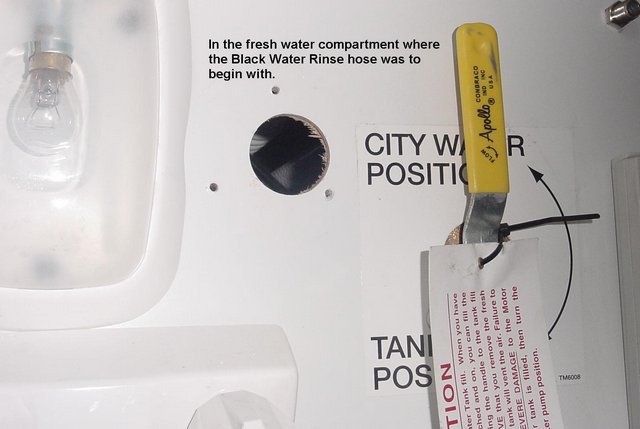
wall just above the compartment. So right in the
middle of the compartment was the input flange for the Black Water
rinse. When you pull up to the dump station, put on your rubber
gloves, connect the drain hose to the dump hole in the ground and pull
the valve handle, the next thing you have to do with your now
dirty hands is open up your fresh water compartment and slobber in
the dump station dirty hose to run water into the Black Water rinse
fitting. This bothers me. The alternative is to add about 5
steps for changing gloves, getting a clean hose onto the fitting and
running it to a water spigot etc. Not my idea of fun.
My alternative was to move the Black Water Rinse
fitting out of the fresh water compartment altogether so I don't even have to open
this door in the vicintiy of the dump station.
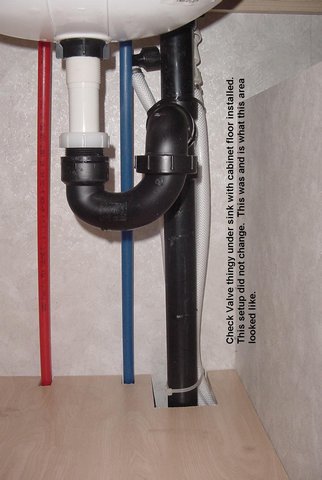
First I traced the hose from the input through the
bathroom and into the drain compartment. There was a check valve
thingy mounted up high under the bathroom sink. 
This
is up high so there is no backwash between the black water tank and the
input flange. This is like the checkvalve/vent on your home
dishwasher. Don't remove this valve from the system as you will
slop black water all over whenever you move the motor home.
This under sink floor pops out revealing the plumbing below.
This is also where the hot water tank bypass valves are located.
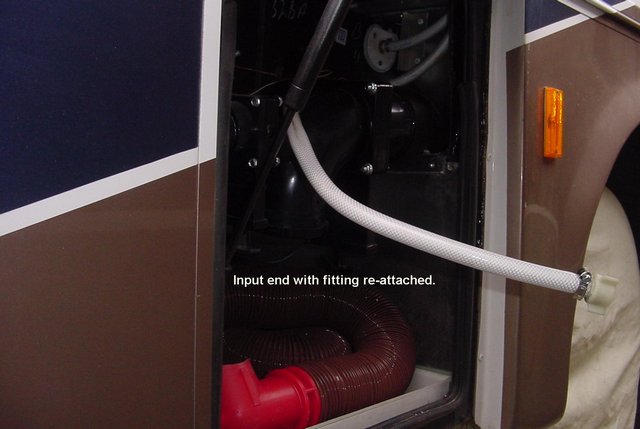
The procedure begins with pulling the input hose up
into the bathroom. Three screws pull the flange from the bulkhead in the
fresh water tank. Then you cut the fitting off the hose
behind the wall and prepare to pull
it up into the bathroom.

The hose runs into the space under the floor out of the fresh water
compartment, up over the generator compartment, through the floor and up
into the space under the false floor of the cabinet under the bathroom
sink. Note that when you pull the hose into the bathroom, you have
crossed the point of no return in the project as threading the hose back
to where it was would be impossible. Next you remove the short front
wall of the under sink area next to the hot water tank. This is
stapled to a couple of slats mounted to the front and back walls of the
cabinet. Just pop it loose with a screw driver. You put it
back on with either small screws or staples from a T50 staple gun.
This clears up space so you see where the tank end of the hose goes down
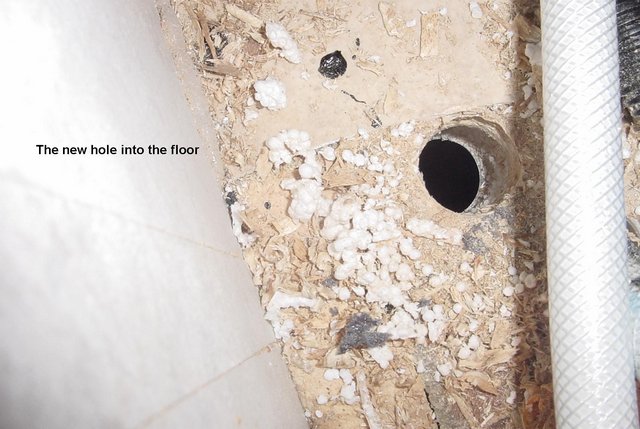
into the drain compartment. Now carefully look at this
place in the floor and where it comes out underneath in the
compartment. Double check and triple check where you think the new
hole should go. When you are sure you will get an inch and a
quarter Forstner bit and drill a hole through the floor. (scarey). 
Now
all the hard stuff is done. Just feed your hose down into this
hole into the drain compartment. Go to Walmart and get a can of
expanding foam stuff and spray into the area under the sink where you
pulled the hose from and then into the hole around the hose into this
drain compartment. Don't overdo it too much as it drains out the
bottom. 
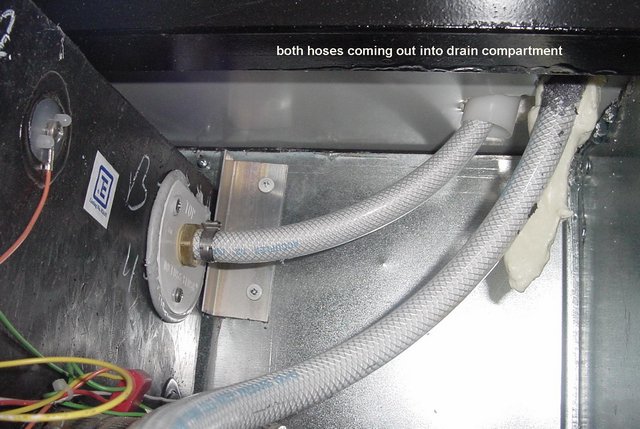
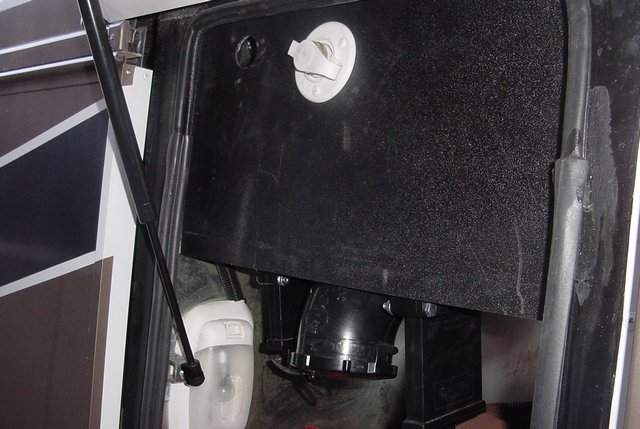
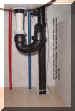
Go
out to the drain compartment and remove the black plastic fascia plate
that hides the dump valve pipes. Note which way it came out so you
put it back in the same way. 
Cut
off the excess hose and reconnect the end fitting you cut off before. Eye
ball a location in this fascia plate for the flange to mount. This
needs to be as low as possible but above the dump valve pipes. (I
did it wrong the first time and not perfect the second time so look this
over carefully.) 
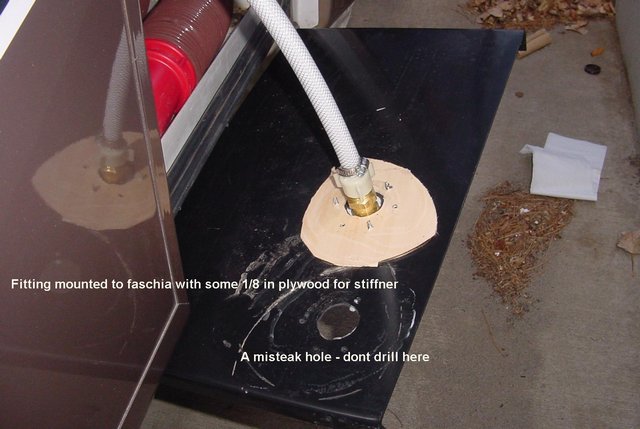
Drill
a hole for the flange with the same bit used on the floor. Screw
the flange into the plastic. I mounted a small piece of 1/8
plywood for stiffness but your choice. Screw the hose onto the
back of the flange with some teflon tape for leak
resistance. Remount the fascia plate inside the
compartment. and clean up your mess.

|
 Why
Do we call it the Butterfly?
Why
Do we call it the Butterfly?